Pages

Monday, April 22, 2024

Deploying Code Signing Certificates via Microsoft Intune


Extract Code Signing Certificate

If you don't have a copy of the code-signing certificate, you can extract it from a file previously signed by the certificate using the following steps:

Option1:
Right-click on the signed file and choose Properties.
Choose the Digital Signatures tab. If this tab does not appear, then the file is not signed.
Choose the appropriate signature from the Signatures list and then select Details. Most files will only have a single signature.
In the Digital Signature Details dialog, choose View Certificate.
In the Certificate dialog, choose the Details tab and select Copy to File.
Complete the Certificate Export Wizard to create a CER file containing the certificate. Choose Base-64 encoded x.509 (.CER) for the Export File Format.
Select OK on the three open dialogs.


Option2:
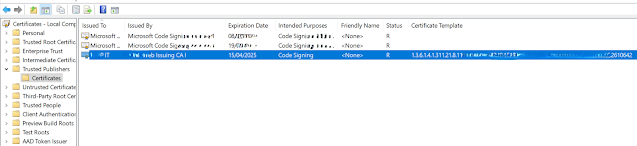
Go to Start > certlm.msc > Run As Administrator
Go to Certificate - Local Computer > Trusted Publishers > Certificates 
Right click on the specific code signing certificate > All tasks > Export
Select Base-64 encoded x.509 (.CER) > Next
Select the File Path > Next
Complete the wizard


Export Thumbprint of the certificate

Run below PowerShell command:

([System.Security.Cryptography.X509Certificates.X509Certificate2]::new("<Certificate Path>")).thumbprint​

Example:


Copy the Thumbprint to text file


Extract base64 encoded version of the certificate

The base-64 encoded version of a certificate is a string-based representation of the certificate. This version contains the complete certificate but in a more portable format that is not bound to a file. 

Go to PowerShell > Run As Administrator
Rune below PowerShell command:

[System.Convert]::ToBase64String(([System.Security.Cryptography.X509Certificates.X509Certificate2]::new("<Certificate Path>")).Export('Cert')) | Set-Clipboard

Example:


Note: Set-Clipboard parameter will automatically copy the output. So you can paste the result into text file straightaway. 


Deploy the certificate via Intune

Create a Configuration profile with below configurations:
  • Platform: Windows 10 and later
  • Profile type: Templates > Custom
  • Configuration Settings (OMA-URI)
    • Name: <Name>
    • OMA-URI: ./Device/Vendor/MSFT/RootCATrustedCertificates/TrustedPublisher/<thumbprint>/EncodedCertificate
    • Data type: String
    • Value: The base-64 encoded version of the certificate without any line breaks. (You can use extracted base64 encoded version of the certificate.)


Deploy to either Device or User group accordingly.


Result:


Note:
Important: Code signing certificate is associate with either intermediate and root certificate. Therefore, make sure you have to deploy the required root and intermediate certificate too in order to working fine. please fine below Microsoft link to deploy root certificate.


References:


Sunday, April 21, 2024

Access Microsoft Graph with access token via PowerShell


Create and Register new Azure AD Application


Go to Azure Portal > Azure Active Directory > App Registration > New Application Registration


Register application with below configurations
  • Name: <Application Name>
  • Supported Account Types: Accounts in this organizational directory only (mycloudpro only - Single tenant)
  • Redirect URI(Optional): <keep this blank>

Click Register 


Go to Owners > Add owners > Add the necessary user as a owner of the application


Go to Certificates & Secrets > Client Secrets > New client secret 
  • Description: <Name>
  • Expires: <Expiration period, EX: 2 years>

Click Add


Note: Make a note of Secret ID and Value. Please note that the complete value is not showing you again after leave the page. Therefore Do Not Forget to make a note of secret value. You paste it to notepad and save in secure location.

Go to API permissions > Add permission > Microsoft Graph > Add below permissions to the newly registered application.

Note: You can choose the required permissions as your requirement. 

Click Grant admin consent for the tenant


Make a not of Tenant ID, Client ID and Secret value of the application. Because there are going to use in the PowerShell script.


Create  a PowerShell script for Auth Token

#################################
#Script Start

$TenantId ="23xxxxx-xxx-xxx-xxx-xxxxxx1"
$ClientId ="33xxxxxx-xxxx-xxxx-xxxx-xxxxxxxx4"
$Secret = "c2xxx~xxxxxxxxxxxxxxxxxxxxxxxxxxxxxED"


$uri = "https://login.microsoftonline.com/$TenantId/oauth2/v2.0/token"

$content = "application/x-www-form-urlencoded"

$queryURI = 'https://graph.microsoft.com/beta/deviceAppManagement/mobileApps/439aaf2e-f738-46c3-a177-4aaff4475a01/?$expand=categories,assignments'


$body = @{

    grant_type = "Client_credentials"
    client_id = $ClientId
    client_secret = $Secret
    scope = "https://graph.microsoft.com/.default"
    

}

#Send a post request to obtain bearer token 

$response = Invoke-WebRequest -Method Post -Uri $uri -Body $body -ContentType $content -UseBasicParsing -ErrorAction Stop

#$accessToken = $response.access_token | ConvertTo-SecureString -AsPlainText -Force

$atoken = ($response.Content | ConvertFrom-Json).access_token

#Generate Header for query by adding Access Token obtained earlier 

$queryHeaders = @{ 
   
    Authorization = "Bearer $atoken"


#Send request  

$queryResult = (Invoke-RestMethod -Method Get -Headers $queryHeaders -Uri $queryURI)

#$queryResult.value

write-host $queryResult

#Script End
#################################


References:


Monday, December 25, 2023

Cybersecurity mitigation activities

Here below few best practices to optimize the security standard and mitigate activities such as remote access, file launching and data transmission etc. by Intruders.

Friday, August 25, 2023

Manage Defender for Endpoint portal access using RBAC

Microsoft recommends using the concept of least privileges. Defender for Endpoint leverages built-in roles within Microsoft Entra ID. Microsoft recommends review the different roles that are available and choose the right one to solve your needs for each persona for this application.

Sunday, April 30, 2023

How to troubleshoot the error: "rights management is not active for the tenant"

This error may cause due to deactivation of rights management service. So below I have put forward step by step guide to how to activate or confirm the status of Azure rights management service.